{Gently Borrowed} DIY Napkin Tutorial
From: Fiesta Resistance
You can see the blog post to its entirety, on it’s original blog post here:
http://www.fiestaresistance.net/2012/01/guest-post-diy-napkin-tutorial.html
Posted by Jordan
Today we’re so happy to have a wonderful guest post from an amazing blogger – Lindsey of Hot Polka Dot. Both creative and stylish, Lindsey is the perfect example of a foodie and a DIYer, as made evident on her blog. Today, she’ll be showing us how to make our very own napkins – which is a great way to add style to your celebration and, of course, save money! Sidenote: Don’t you just love her nails?
——————————————————–
If you’re like me and you were lucky enough to get a sewing machine for Christmas, you’ll need a little practice before you get into the tricky stuff like bridesmaid dresses or heirloom quilts. Can’t get much more basic than the common dinner napkin.It’s easy, it’s cute and it’s sure to impress at your next dinner party.
Why search Target, Home Sense and Pier One for just the right shade of kind-of-orange-but-more-brown-brick red to match your vintage tablecloth when you can walk into any Fabricland and choose from an array of colours and patterns? It doesn’t take long at all to whip up a set of one-of-a-kind napkins and you’ll see just how simple it is to do a perfect mitered corner to add a professional touch.
All the best places end in “land” don’t they? Disneyland, Candyland, Wonderland, Fantasyland, Adventureland, Funland, Galaxyland, Legoland, Playland… Fabricland is like some kind of squishy, silky soft heaven filled with crafty possibilities. I always find I walk in there with one project in mind and walk out carrying the makings of ten more. Fabricland is to crafter as library is to bookworm. Mecca.
Now if Fabricland would just install a few cotton candy stands, tea cup rides, popcorn machines and water slides we’d be set.
You’ll need…
1 metre cotton quilting fabric
Measuring tape
Bristol board template (optional)
Marking pencil
Scissors
Iron
Thread of your choice
Pins
Sewing machine
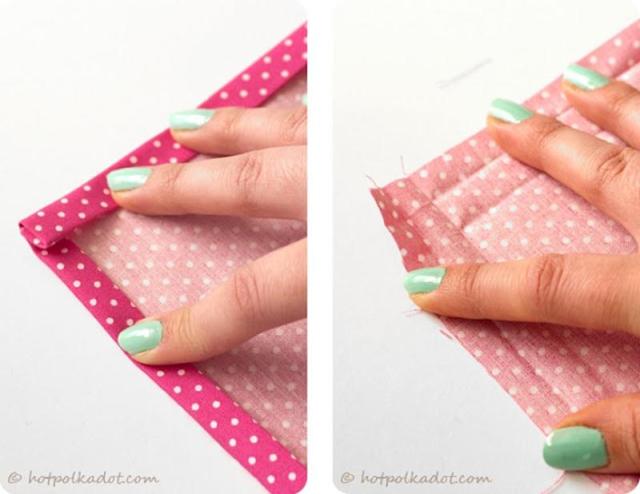
Start by cutting out your squares of fabric. I used a template made of bristol board to make measuring easy. I made four 17 inch squares to make standard 16 inch napkins, but the choice is yours. Using a hot clothes iron, press down a 1/4 – 1/2 inch of all four corners. Double it to fold those edges in on themselves again and press another 1/4 – 1/2 inch on top of each.

Unfold your freshly pressed edges so you can see the iron lines. Using the creases as a guideline, trace a 45 degree angle from the second press line of one edge to the second press line of the other edge and cut off the outside corner.

Fold and iron down 1/4 – 1/2 inch of this new corner to match the sides. Following your old press lines fold in the edges to meet diagonally in the middle of the new corner to form a perfect mitered corner. Give an overall press and pin down all the corners and edges.
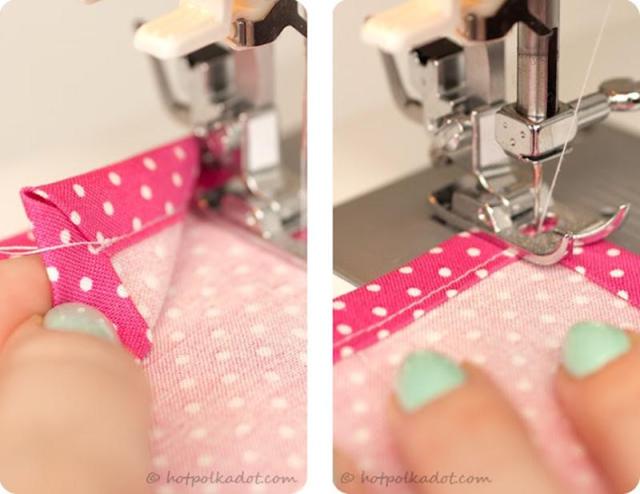
Using your sewing machine stitch the hem in place keeping the needle as close to the inner edge of the hem as you can stand. Be careful not to run the pins over with the foot and needle as that can break your needle. Instead remove them as you go. At each corner lift the foot and pivot the fabric 90 degrees to continue the stitch down the next side. Make sure to double up the stitches at the beginning and end of the hem by backstitching.

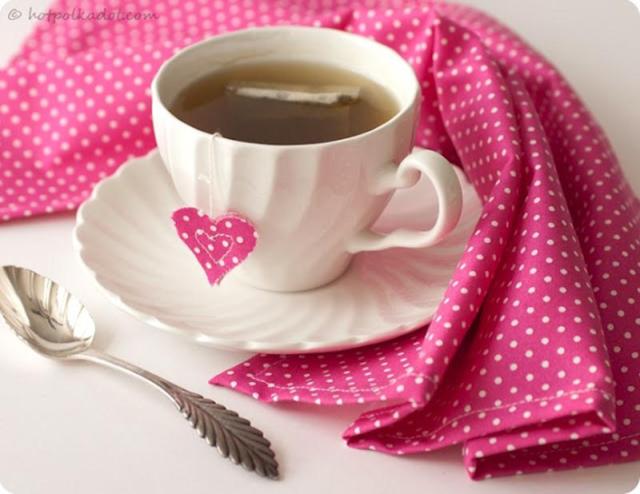
And there you have it! A pretty napkin with perfectly mitered corners! Perfect for adding some texture to your food photography, jazzing up your dinner table or giving as a thoughtful and creative housewarming gift.